


Finalizing this month’s series on data protection, I wanted to follow up last week’s blog post on installing Avamar Virtual Edition with this one, which is installing Data Domain Virtual Edition. The two are often married together in Data Protection deployments. Simply put, Avamar is the front end backup engine that has all of backup software, and DataDomain is the landing spot for the backup data. DataDomain is Dell EMC’s appliance based deduplication device. It is the market leader in purpose-built backup appliances. Various workloads can be ingested, including data from Avamar, VEEAM, Networker, etc. Like the Avamar VE, DataDomain VE allows you fully take advantage of virtualization in one easy to manage package. The virtual edition is geared towards small-to-medium size environments and/or EDGE locations (ROBO). With that said, let’s get started!
Be sure to check out the system requirements before you proceed.

Dell EMC easily allows anyone to give DataDomain VE a try. To get started, first download the trial copy by heading over to Dell EMC’s website.
In the upper right hand corner, select download for the VMware 0.5TB Try and Buy.

Select download

The download file should start downloading

Once the download is complete, extract the OVA file.

The extracted contents should show the following contents.

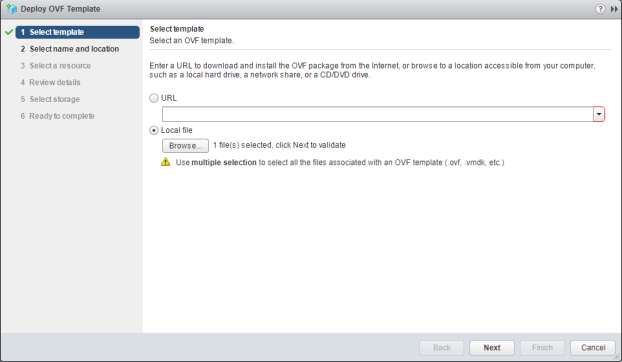
Login to vSphere and deploy OVF from by right clicking the appropriate host/cluster and selecting “Deploy OVF Template”.
Select name and location, then click next.

Select the appropriate cluster or host resource and click next.

Review the details and click next.

Agree to the licence agreement.

Select your configuration. Since this is a test, I am deploying the smallest configuration possible, which is 4TB. *Note you can utilize up to 0.5-4TB. You don’t have to use all 4TB once deployed, you just can’t use more than 4TB. The Evaluation License only allows usage for up to 0.45TB.

Select the appropriate DataStore. *Note since this is a test, I selected thin provisioning. Thin provisioning isn’t officially supported.

Select the appropriate networks, then click next.

The OVF package will now deploy on the specified host/cluster.

Once deployment has completed successfully, right click the DDVE and select power-on. The system will begin to Initialize.

Initialization will continue for some time.

Once initialization completes, you are welcomed with a DataDomain login screen via the console window. Change the password at this time, then select “no” when prompted to configure system using the GUI wizard. *Important note, hit “enter” to move to the next step or skip that item when working within the console.

To login, use the default “Sysadmin” login and password, which is “changeme”

Once logged in successfully, you will be prompted to configure networking. Type “yes” to configure networking. Type “no” to use DHCP. Next, type in your Hostname, domain name, etc.

When prompted to enable Ethernet port, type “yes”. Select “no” to use DHCP on this Ethernet port. Enter the IP address, netmask, and gateway.

Hit enter to skip IPV6, then enter your DNS servers.

Review the pending network settings and “save” the configuration to complete.

Type “no” when asked to configure eLicense Configuration, then type “yes” when asked to configure system at this time. Type in all relevant system information, such as email, location, mail server, etc.

Finally, once the time zone has been entered, you can save the settings. Type “save”.

Once you have completed these steps, the configuration is finished. You can type in the DNS/IP name of the DDVE into a web browser to connect. Next, you reach the splash page that requests a license key.

Provide the trial license “eval.lic” by browsing to the download location that contains the extracted OVA file, then hit “apply”.

Once completed, you can login via the IP/DNS name of the DDVE utilizing a web browser of your choice. The default login is “sysadmin” and the default password is “changeme”

We have now successfully deployed the DDVE; however, the setup isn’t complete yet. We must now add additionally hard disk in order to present storage to the system. This will allow us to create and enable to file system. *Note the trial license only allows for 0.5TB, so I’ve gone to my DDVE within vCenter and added two 250GB vmdk hard disk (each with a separate storage controller). Duplicate these steps within your DDVE instance, then click OK to add the Hard Disks.

From the main splash screen, select “Data Management” then “File system”. In the upper left hand corner, select “create”. You will have a window display two hard disk beneath available storage. Select both disk, then click “Add to tier” to add the disk to the “active tier”, then click next.

You now see the active tier has two SAS devices. Click next. *Note, the eval license only allows for a total of 0.45TB.

The DDVE will now configure the two VMDKs for the active tier.

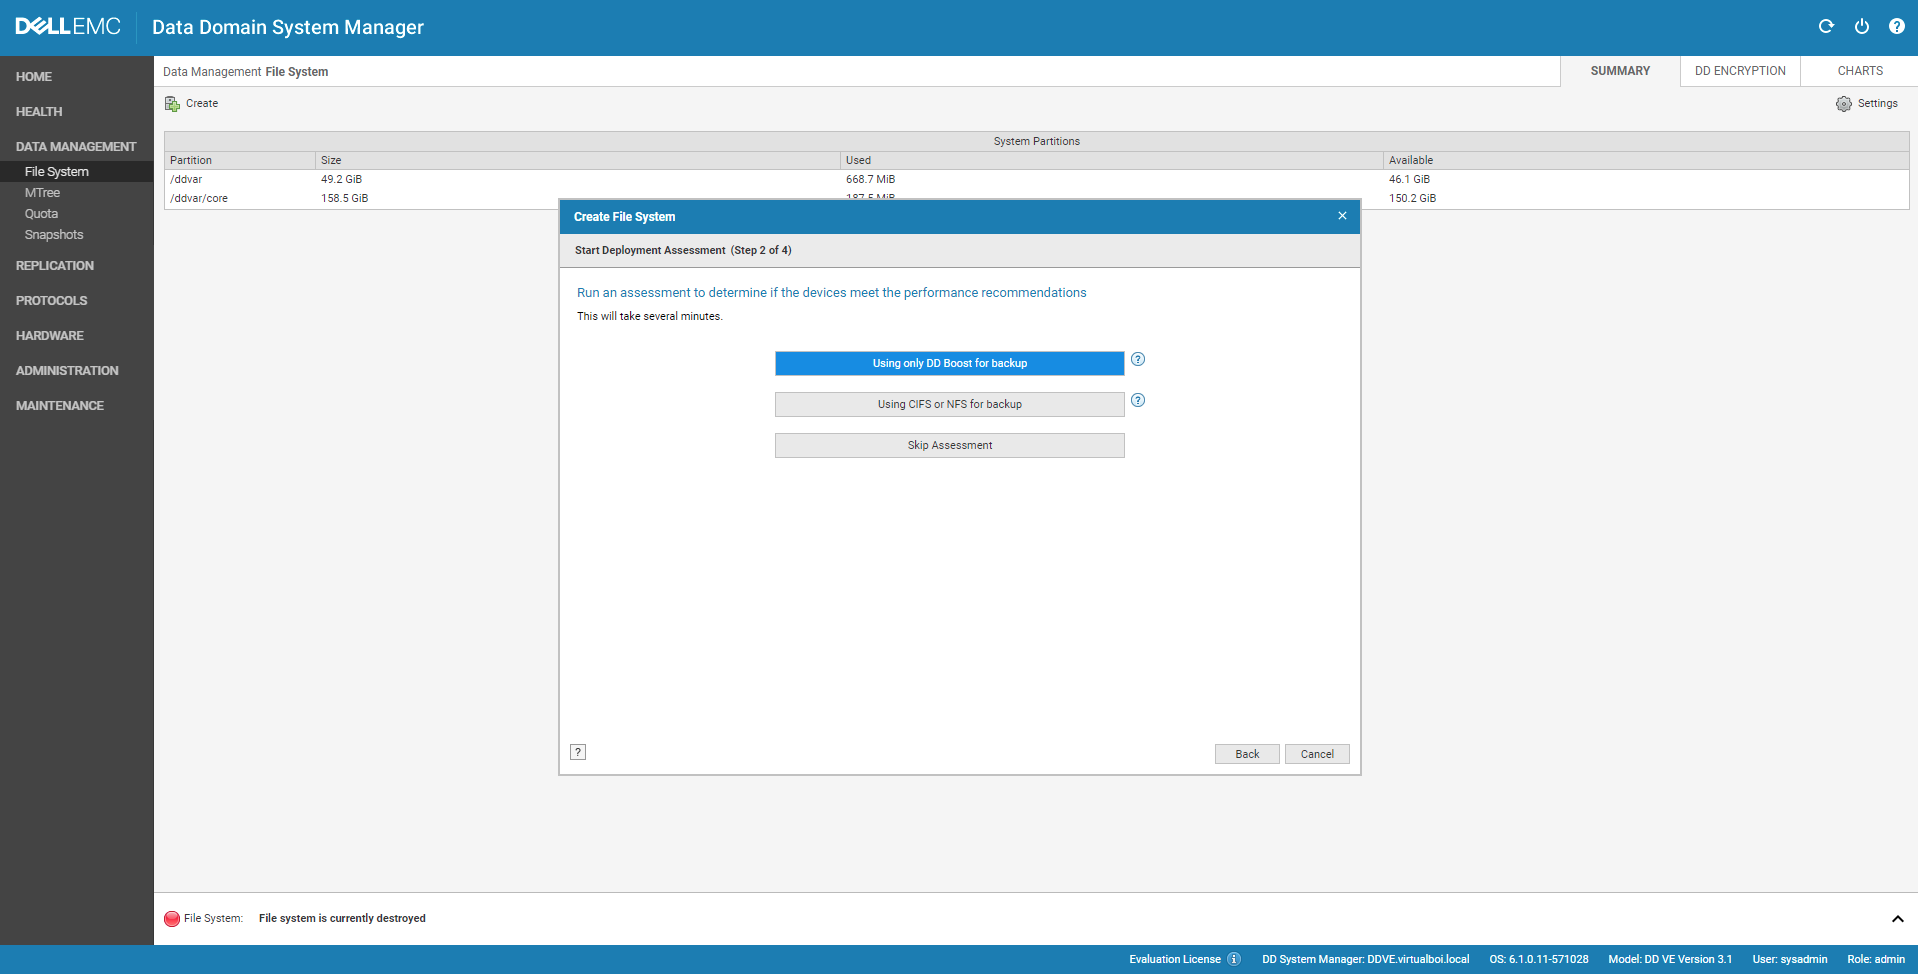
Use the assessment if needed, or skip next to continue.
Create the File System by clicking next on Step 3. Ensure enable file system is selected.

The file system creation process begins.

This will take some time as the VMDKs get added to the DDVE and the DDVE creates/enables the file system. Once completed, click close.

Select dashboard to see the status of the system. You should have green for Replication, CIFS, NFS, and DDBoost. You have successfully deployed your DDVE!


Thank you for insght on DDVE installation! Do you know if DDVE is installable in the free, unlicensed edition of ESXi?
LikeLike
I believe so, since it would be treated like any other VM.
LikeLike